
Welcome, fellow time travelers and pixel pioneers! The allure of retro gaming isn't just about nostalgia; it's about reconnecting with the foundational experiences that shaped video games forever. From the satisfying click of a cartridge to the iconic soundtracks of the 8-bit and 16-bit eras, creating a dedicated space for these classics is a uniquely rewarding journey. The right environment enhances the authenticity and pure joy of playing games on their original hardware or through faithful recreations.
This guide is your blueprint for crafting the perfect retro gaming sanctuary. We will explore a curated collection of retro gaming setup ideas designed for every type of enthusiast. Whether you're a purist aiming for a period-accurate CRT experience or a pragmatist looking to build an all-in-one emulation powerhouse, we have a detailed plan for you.
Inside, you will find actionable advice and specific product recommendations for seven distinct setups, including:
- Classic CRT monitor setups with original consoles
- Sleek, multi-console emulation stations
- Compact bartop arcade cabinets
- Modern displays optimized with professional upscalers
Get ready to design a space that's not just a gaming corner, but a true homage to the golden age of video games. Let’s dive in.
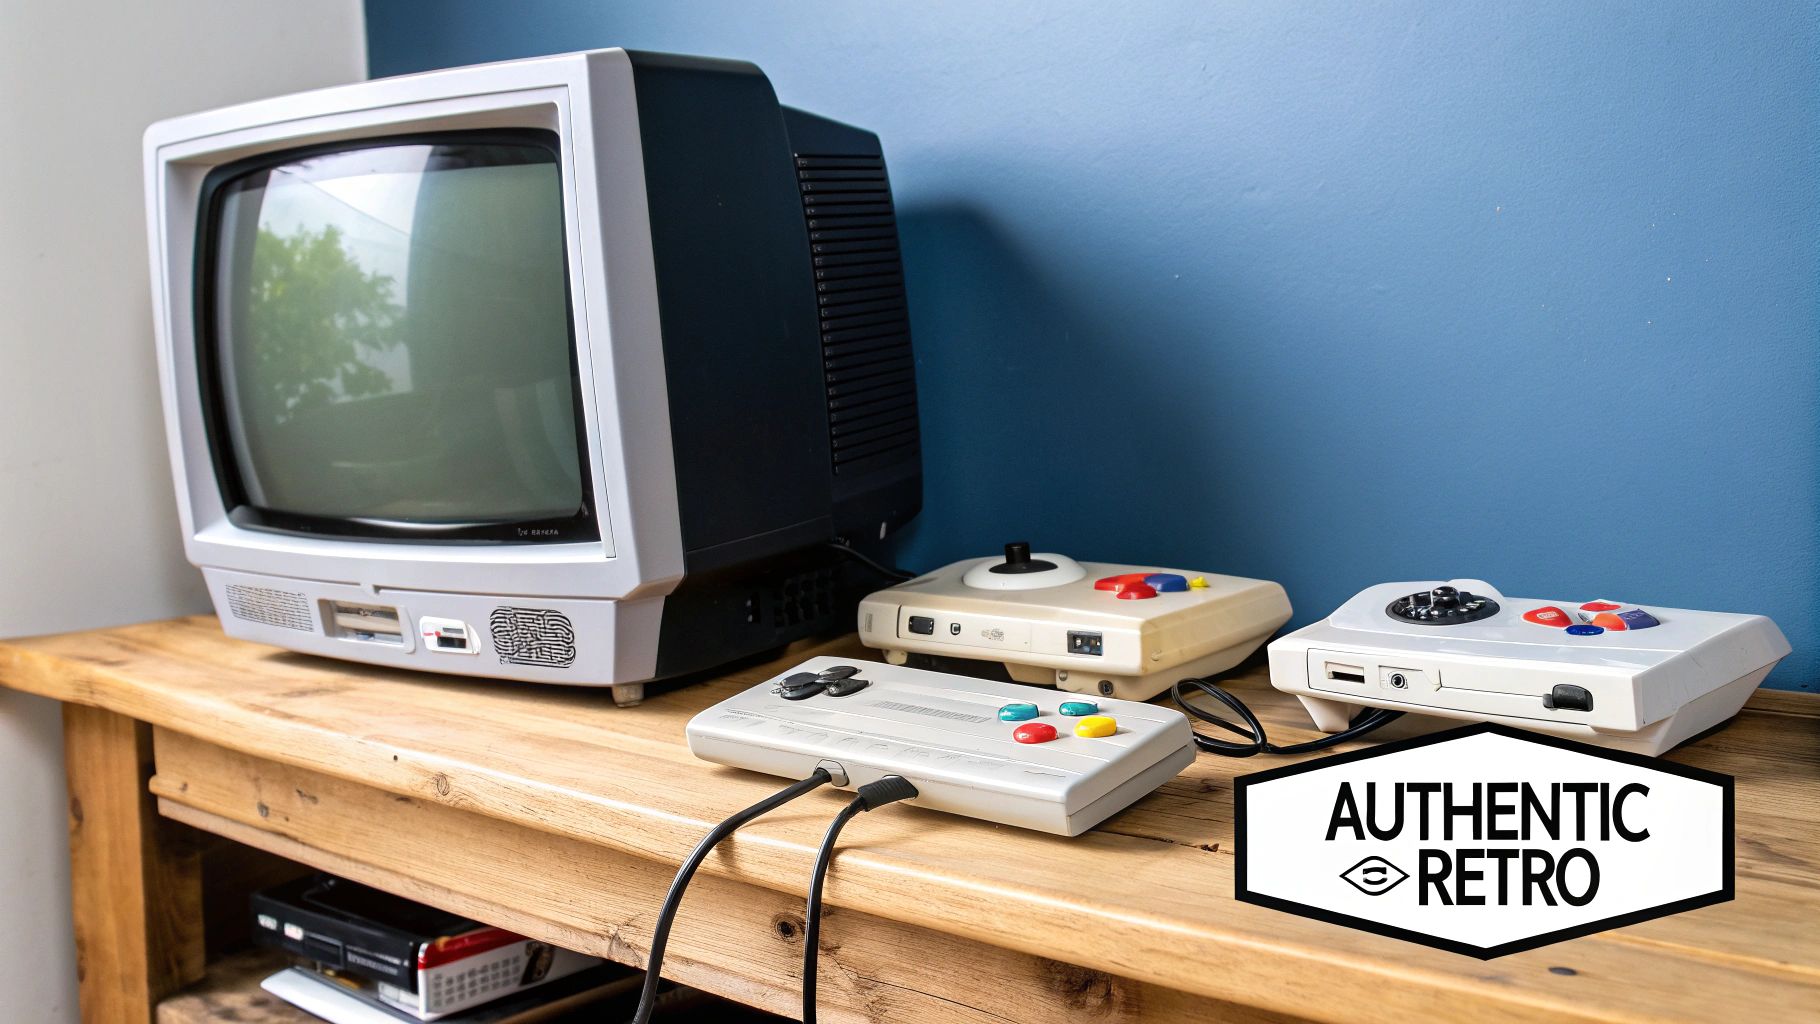
1. Classic CRT Monitor Setup with Original Consoles
For the ultimate purist, nothing beats the authenticity of playing original games on the hardware they were designed for. A classic CRT (Cathode Ray Tube) setup is the cornerstone of this approach, delivering an experience that modern flat-panel displays simply cannot replicate. This is one of the most popular retro gaming setup ideas because it preserves the artistic intent of the original game developers, from pixel art to light gun compatibility.
The magic of a CRT lies in its analog nature. The characteristic scan lines, vibrant color bleed, and unique phosphor glow are not flaws; they are integral components of the visual presentation. Games from the 8-bit and 16-bit eras were designed with these screen properties in mind. Furthermore, CRTs offer virtually zero input lag, a critical feature for genres like fighting games and platformers that demand split-second timing.
Why Choose This Setup?
This setup is for gamers who prioritize historical accuracy and the original "feel" of classic games. It’s perfect for anyone who wants to play their Sega Genesis, Super Nintendo, or PlayStation 1 exactly as they would have in the 1990s. Light gun games like Duck Hunt or Time Crisis are only functional on CRT displays, making this setup essential for fans of the genre.
Key Implementation Tips
Getting started requires a bit of research, but the payoff is immense. Focus on sourcing the right display and connecting it properly for the best results.
- Find the Right Display: While any consumer-grade CRT will work, enthusiasts often seek out professional video monitors (PVMs) or broadcast video monitors (BVMs) from brands like Sony or JVC for their superior image quality and input options. The Sony Trinitron consumer line is also a highly celebrated alternative.
- Prioritize Video Signals: To get the sharpest picture, use the best video connection your console supports. The quality hierarchy is typically: RGB > Component > S-Video > Composite. Using high-quality SCART or component cables will make a world of difference compared to the standard yellow composite cable.
- CRT Safety and Testing: Before purchasing a used CRT, test it for screen burn-in, geometry issues, and color convergence. Remember that these devices contain high-voltage components and can be very heavy, so handle them with care and ensure they have adequate ventilation.
This approach has been championed by communities like the one curated by the website RetroRGB and the popular YouTube channel My Life in Gaming, which provide invaluable resources for achieving the best possible picture from original hardware.
2. Multi-Console Emulation Station
For those who crave variety and modern convenience, an emulation station offers an all-in-one solution. This setup uses software to replicate the hardware of numerous vintage consoles, allowing you to play thousands of games from a single, streamlined device. This is one of the most versatile retro gaming setup ideas, consolidating entire collections onto a compact PC or single-board computer, making it perfect for gamers with limited space or a broad range of interests.
The core of this approach is emulation software like RetroArch, paired with a user-friendly frontend such as RetroPie or LaunchBox. This combination allows you to organize games from dozens of systems, from the Atari 2600 to the PlayStation 2, into a single, navigable library. It bridges the gap between authentic retro feel and modern features like save states, screen filters, and wireless controller support.
Why Choose This Setup?
This setup is ideal for gamers who want to explore the vast history of video games without the expense and maintenance of collecting original hardware. It is the ultimate plug-and-play library, perfect for discovering hidden gems or revisiting classics from multiple eras. It also offers immense customization, allowing you to tailor the visual and gameplay experience to your exact preferences.
Key Implementation Tips
Building an emulation station is a rewarding project that can be scaled to fit any budget or technical skill level. Success lies in choosing the right hardware and fine-tuning the software configuration.
- Select Your Hardware: A Raspberry Pi 4 running RetroPie is a popular and affordable starting point. For more demanding systems like the Dreamcast or GameCube, consider a more powerful mini-PC, an Nvidia Shield TV, or a custom computer build.
- Invest in Quality Peripherals: Use high-quality, low-latency controllers to ensure a responsive gaming experience. Fast storage, such as a reputable SD card or an SSD, is also crucial for reducing load times and preventing performance issues.
- Customize Your Visuals: Experiment with shaders and filters within your emulation software to replicate the look of a classic CRT monitor. This can add scan lines, screen curvature, and phosphor glow for a more authentic retro aesthetic on a modern display.
- Backup Everything: Always keep backups of your game ROMs (of titles you legally own), save files, and system configuration. This protects your progress and setup from data corruption or hardware failure.
This modern approach to retro gaming is heavily supported by communities like The Retro Game Corps and popular YouTube channels such as ETA Prime, which offer tutorials and reviews. If you are interested in exploring different systems to emulate, you can learn more about the best retro gaming consoles to decide where to start your collection.
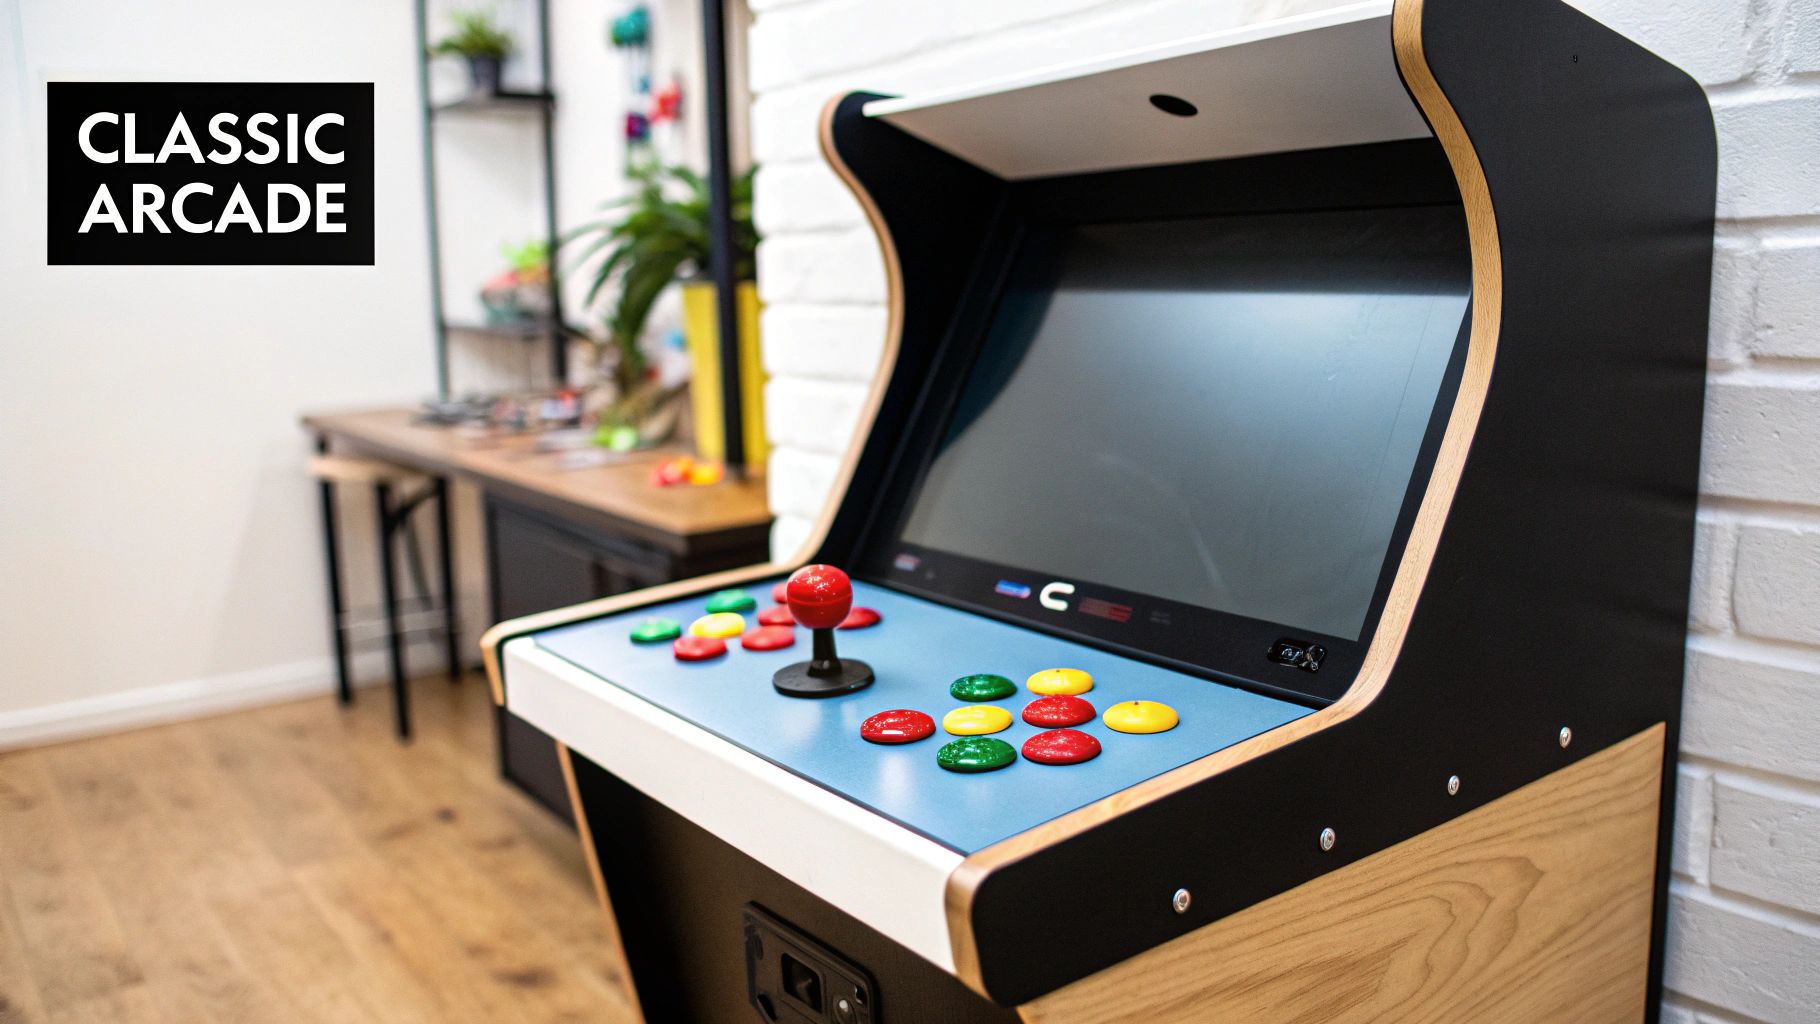
3. Bartop Arcade Cabinet
For those who crave the tactile thrill of an arcade but lack the space for a full-sized machine, the bartop arcade cabinet offers the perfect compromise. This compact setup recreates the classic arcade experience in a smaller footprint, designed to sit comfortably on a table, desk, or countertop. It's one of the most satisfying retro gaming setup ideas for fans of fighting games, shoot 'em ups, and beat 'em ups, delivering authentic controls without dominating a room.
These tabletop machines capture the essence of the arcade, featuring genuine joystick-and-button layouts and a dedicated screen, all housed in a miniature cabinet. Whether you purchase a pre-built unit like those from Arcade1Up or embark on a DIY project, a bartop cabinet becomes an instant centerpiece, blending nostalgia with practical, space-saving design.
Why Choose This Setup?
This setup is ideal for gamers who want the hands-on, authentic feel of arcade controls for classics like Street Fighter II or Pac-Man. It's a fantastic solution for apartments, game rooms, or offices where a full cabinet isn't feasible. Building your own also offers a highly rewarding and customizable project, allowing you to tailor the machine's theme, controls, and game library to your exact preferences.
Key Implementation Tips
Building or setting up a bartop arcade requires attention to detail to ensure an authentic and reliable experience. Focus on quality components and thoughtful assembly.
- Use Quality Arcade Parts: The feel of the controls is paramount. Invest in authentic arcade parts from brands like Sanwa or Seimitsu for the joystick and buttons. This single choice dramatically elevates the gameplay experience over cheaper alternatives.
- Plan Your Button Layout: Different games require different layouts. Consider a versatile layout, like the Vewlix or Noir configurations, that accommodates a wide range of fighters and classic titles. Plan this before you drill any holes in your control panel.
- Ensure Proper Ventilation: The internal electronics, especially the computer or Raspberry Pi running the emulation software, will generate heat. Incorporate small fans and ventilation cutouts in your design to prevent overheating and ensure long-term stability.
- Finish with T-Molding: For a professional, polished look, apply T-molding to the edges of the cabinet panels. This not only protects the wood but also gives your machine that classic, finished arcade appearance.
This approach has been popularized by communities like The Geek Pub and detailed on YouTube channels such as This Old Tony, which offer excellent guides for DIY builders. If you want to dive deeper into the world of arcade hardware, explore resources that offer a beginner's guide to collecting old arcade games and their components.
4. Handheld-Focused Gaming Corner
For those who believe the best gaming happens on the go, a Handheld-Focused Gaming Corner offers a dedicated space to celebrate portable gaming history. This setup moves away from the traditional TV and console layout, creating a cozy and efficient environment optimized for handhelds from the original Game Boy to the PlayStation Portable and even modern retro devices like the Analogue Pocket. This is one of the more personal retro gaming setup ideas, focusing on comfort and a curated collection.
The essence of this setup is creating an intimate and comfortable nook. It's about having everything you need for a portable session within arm's reach: perfect lighting, convenient charging, and your collection beautifully displayed. This approach honors the unique design and library of each handheld, providing a distraction-free zone to dive into classics without being tethered to a large screen.
Why Choose This Setup?
This setup is ideal for collectors and players who appreciate the unique charm and convenience of portable gaming. It’s perfect for those with limited space who still want a dedicated gaming area. Whether you’re reliving Pokémon Red on a modded Game Boy Color or tackling Castlevania: Symphony of the Night on a PSP, this corner is your personal portal to handheld worlds.
Key Implementation Tips
Creating the perfect handheld corner is all about comfort, accessibility, and preservation. Focus on enhancing the native experience of these classic devices.
- Comfort and Lighting: Start with a comfortable chair or beanbag. Use adjustable lighting, like dimmable LED strips or a targeted desk lamp, to illuminate the device without causing screen glare.
- Power and Organization: A multi-port USB charging station is a must-have to keep your collection powered up. Use display stands, acrylic risers, or wall-mounted shelves to showcase your consoles. Organize game cartridges in clear cases for easy browsing and protection.
- Upgrade Your Visuals: For older systems like the Game Boy or Game Gear, consider an IPS screen mod. These modern screens offer vastly improved brightness, color, and viewing angles, making classic games more playable than ever. Screen magnifiers are another great, non-permanent option for smaller displays.
This approach has been popularized by modern hardware manufacturers like Analogue and modding communities celebrated by YouTubers like The Retro Future. These communities provide endless inspiration for upgrading and enjoying classic handhelds. To dive deeper into the hardware itself, you can learn more about the best handheld gaming systems and find the perfect centerpiece for your corner.
5. Modern Display with Upscaler Setup
For gamers who want the best of both worlds, a hybrid approach combines original retro consoles with modern flat-panel displays. This setup uses specialized upscaling devices like the RetroTINK, OSSC, or Framemeister to bridge the gap between old and new technology. This is one of the most versatile retro gaming setup ideas because it maintains hardware authenticity while providing the convenience and clarity of an HD or 4K screen.
The core of this setup is a high-quality video scaler, which takes the low-resolution analog signal from a classic console and intelligently converts it to a clean, crisp digital HDMI signal. These devices are engineered to perform this conversion with virtually zero added input lag, preserving the responsive feel of the original experience. The result is a sharp, vibrant image on your modern TV, free from the blurry, laggy mess that often occurs when plugging old consoles directly into a flat-panel display.
Here is a quick reference summarizing the key considerations for this setup.
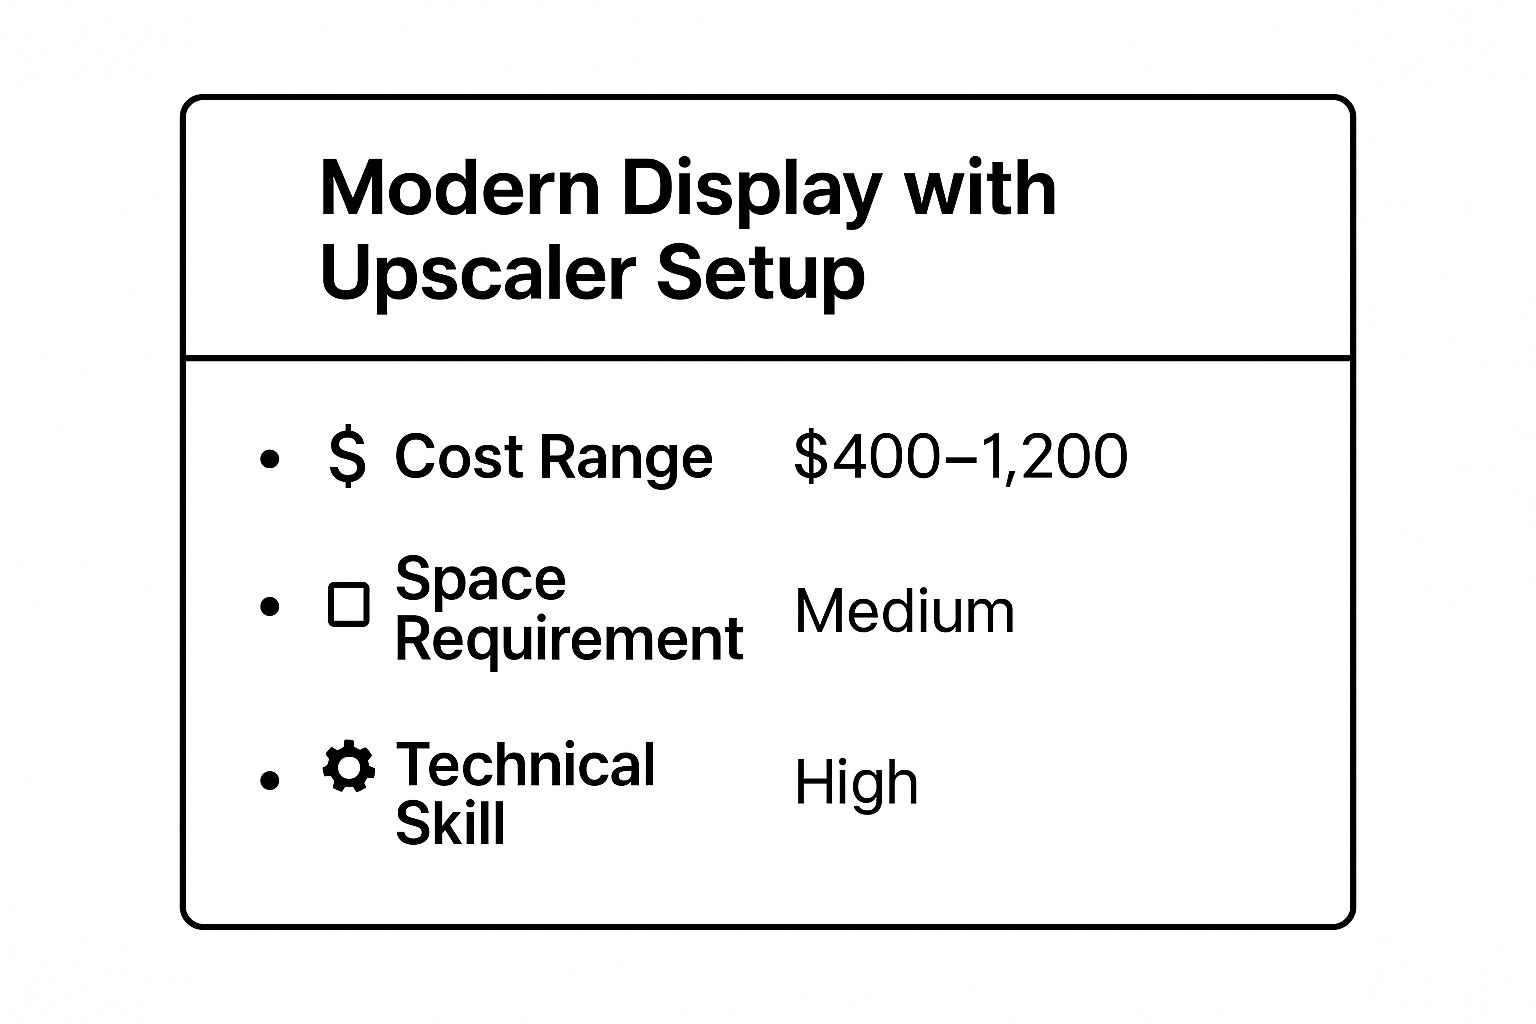
As the infographic highlights, this setup requires a notable investment and a high degree of technical knowledge to implement correctly.
Why Choose This Setup?
This setup is ideal for enthusiasts who own original console hardware but lack the space for a bulky CRT or simply prefer the sharp, pixel-perfect look on a modern display. It offers a clean, convenient, and high-fidelity way to enjoy your collection on a large 4K OLED or LCD screen. It is the perfect middle ground between the absolute purity of a CRT and the convenience of pure emulation.
Key Implementation Tips
Achieving the perfect upscaled picture requires attention to detail throughout your video signal chain. From cables to display settings, every component matters.
- Invest in an Upscaler: The market is led by devices like the RetroTINK-5X Pro and the Open Source Scan Converter (OSSC). Research which device best fits your specific consoles and budget. The RetroTINK line, created by Mike Chi, is known for being user-friendly, while the OSSC offers deep customization for advanced users.
- Maximize Your Signal: An upscaler is only as good as the signal it receives. Use the best possible video output from each console, which is almost always RGB. This often means using high-quality, properly shielded RGB SCART cables connected to a SCART switch for managing multiple systems.
- Calibrate Your Display: Set your modern TV to "Game Mode" to minimize its internal processing and reduce input lag. You may also need to adjust aspect ratio settings to ensure a correct 4:3 display and disable any artificial sharpening or motion smoothing features that can degrade the image.
This modern approach has been popularized by the detailed guides on the RetroRGB website and the excellent tutorials from the My Life in Gaming YouTube channel, both of which are essential resources for anyone diving into the world of high-end video scaling.
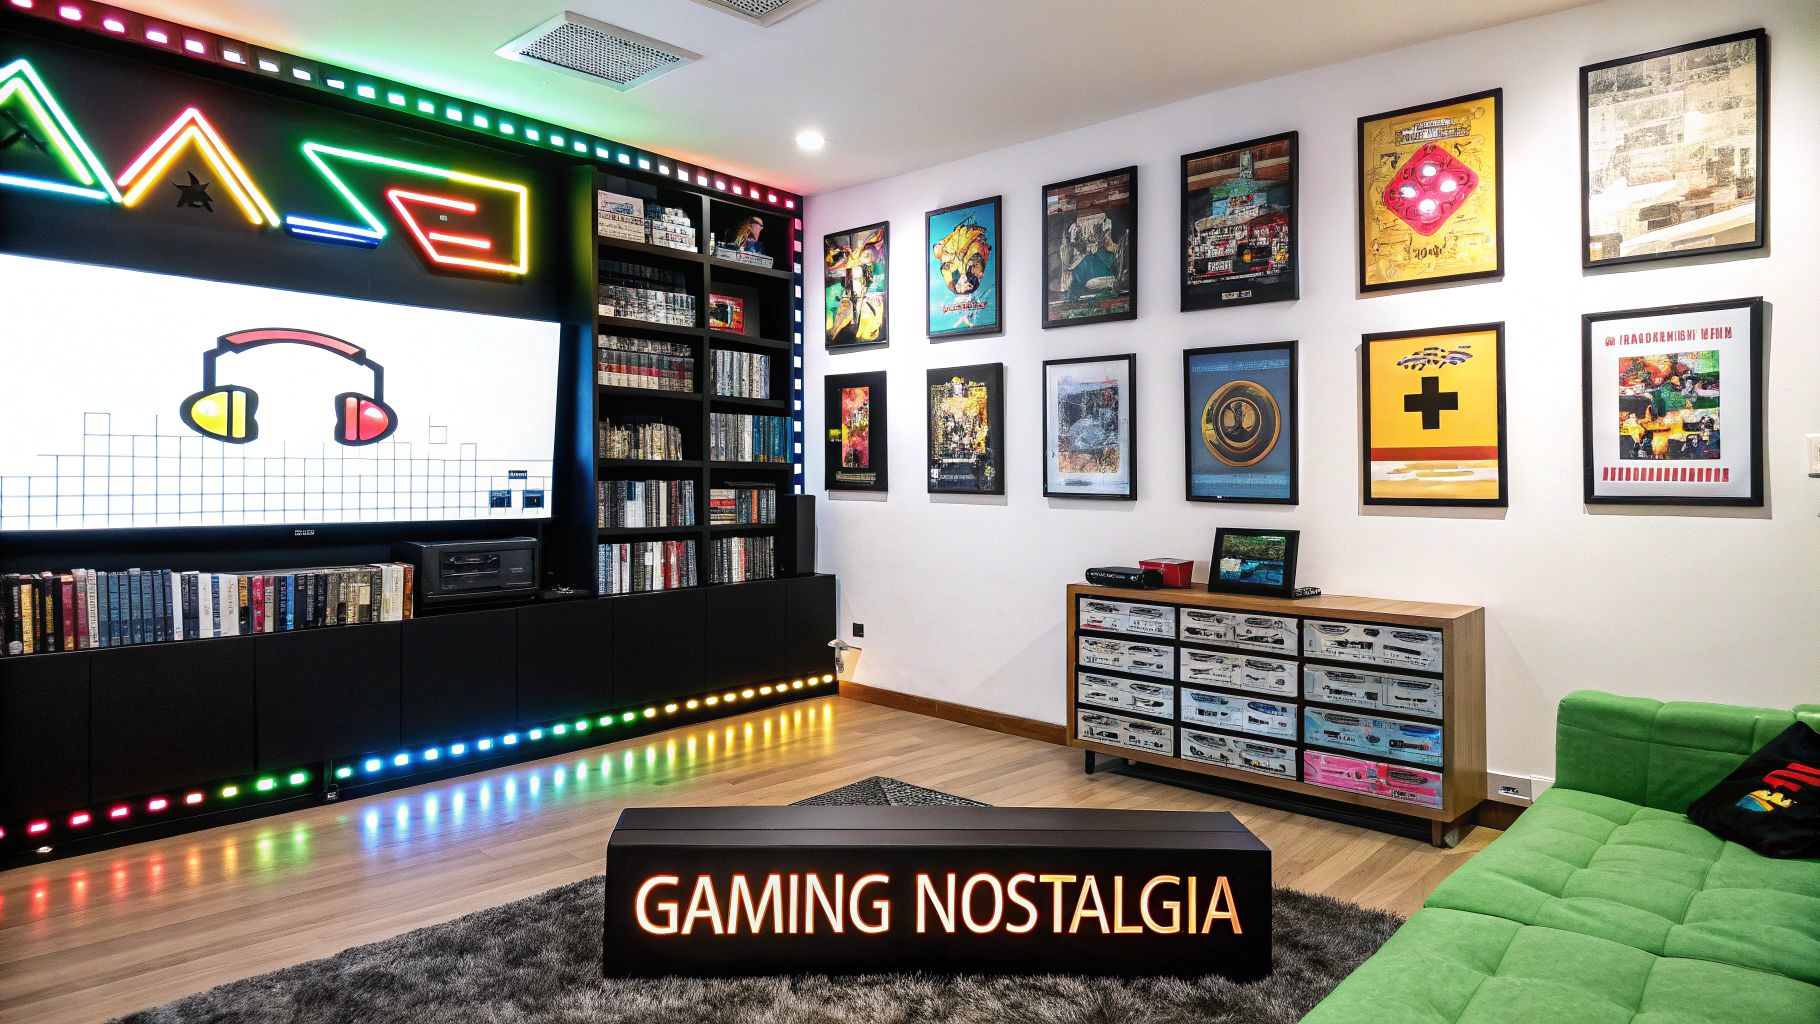
6. Themed Room Recreation
For the truly dedicated enthusiast, a retro gaming setup is more than just hardware; it's a time machine. Themed room recreation is the ultimate expression of nostalgia, transforming an entire space into an immersive environment that captures the look and feel of a specific gaming era. This approach goes far beyond simply setting up a console, incorporating period-appropriate furniture, decor, and technology to build a complete sensory experience.
This is one of the most ambitious retro gaming setup ideas, but it offers an unparalleled payoff in atmosphere. Whether you’re recreating a neon-drenched 1980s arcade with wood paneling, a cozy 1990s kid's bedroom complete with a small CRT television and posters, or an early 2000s LAN party den, the goal is to fully transport yourself back in time every time you sit down to play.
Why Choose This Setup?
This setup is for the storyteller, the historian, and the gamer who wants to create a holistic and deeply personal space. It’s ideal for those who value atmosphere as much as gameplay, creating a sanctuary that celebrates not just the games, but the culture that surrounded them. If you want a gaming room that feels like a living museum exhibit you can interact with, this is the perfect project.
Key Implementation Tips
Achieving an authentic themed room requires a keen eye for detail and a bit of treasure hunting. The key is to focus on a specific time and commit to the aesthetic.
- Pick and Stick to an Era: Decide if you're building a 1980s arcade, a 1990s living room, or a 2000s gaming den. Sticking to a narrow time frame creates a more cohesive and believable environment.
- Hunt for Authentic Decor: Thrift stores, estate sales, and online marketplaces are your best friends. Look for period-correct furniture, lamps, posters, and even vintage electronics like VCRs or boomboxes to complete the scene.
- Incorporate Non-Gaming Elements: The magic is in the details. Include authentic items like old gaming magazines (Nintendo Power, EGM), promotional movie standees, or even era-specific snacks and drinks to fully flesh out the space.
- Get the Lighting Right: Lighting is crucial for setting the mood. Use incandescent bulbs for a warm, 90s bedroom feel, or invest in neon and black lights to capture that quintessential arcade glow.
Content creators like the team behind Pixel Game Squad and YouTubers such as MetalJesusRocks have popularized this concept through their own incredible room tours, offering endless inspiration for crafting the perfect retro retreat.
7. Flash Cart and Everydrive Collection Setup
For gamers who crave the authentic feel of original hardware but desire the convenience of a modern digital library, the flash cart setup is the perfect hybrid. This approach utilizes powerful cartridges, like the popular EverDrive series, that contain an SD card slot. This allows you to load an entire console's game library onto a single cart and play it on the real console, offering the best of both worlds. This is one of the most practical retro gaming setup ideas for those who want to minimize physical clutter while maximizing their playable collection.
The brilliance of a flash cart is its ability to perfectly replicate the hardware experience without the need to own hundreds of individual, often expensive, game cartridges. These devices load game ROMs from an SD card directly into the console, tricking it into thinking an original cartridge is inserted. This means you get the precise timing, sound, and controller response of the original system, combined with modern features like instant loading, save states, and even support for game mods and fan translations.
Why Choose This Setup?
This setup is ideal for the serious player who wants to explore a console's entire library, from well-known classics to obscure imports and homebrew titles. It's a cost-effective and space-saving alternative to collecting physical games, which can be prohibitively expensive and difficult to store. If you love the feel of the original NES controller in your hand but want access to every game ever made for it at the push of a button, this is your solution.
Key Implementation Tips
Setting up a flash cart is straightforward, but a few key steps ensure a seamless experience. The focus is on acquiring a quality device and organizing your digital library effectively.
- Buy from Reputable Sources: The market has many clones and low-quality alternatives. Purchase directly from official creators like Krikzz (the maker of EverDrive) or well-known resellers to avoid counterfeit products that may not work correctly or could even damage your console.
- Use High-Quality SD Cards: Not all SD cards are created equal. Use cards from reputable brands like SanDisk or Samsung to ensure fast loading times and prevent data corruption. Check the flash cart's specifications for recommended card size and format.
- Organize and Update: Keep your game ROMs organized in folders on the SD card (e.g., by genre, region, or personal favorites) for easy navigation. Periodically check the manufacturer's website for firmware updates, which can add new features, improve compatibility, and fix bugs. Remember to only use ROM files of games you legally own.
This modern approach to retro gaming is championed by preservation communities and popular YouTube channels like Modern Vintage Gamer, which often showcase the incredible capabilities of these devices for playing, testing, and exploring classic game libraries.
7 Retro Gaming Setup Ideas Comparison
| Setup Type | Implementation Complexity 🔄 | Resource Requirements ⚡ | Expected Outcomes 📊 | Ideal Use Cases 💡 | Key Advantages ⭐ |
|---|---|---|---|---|---|
| Classic CRT Monitor Setup | Medium - requires video signal knowledge | High - bulky CRTs, original hardware | Authentic retro experience with zero lag | Purists seeking original look and feel | 100% authentic, perfect compatibility |
| Multi-Console Emulation Station | Medium - some Linux/configuration skills | Low - compact SBC/PC hardware | Wide game library, save states, network play | Affordable all-in-one multi-console solution | Massive library, modern conveniences |
| Bartop Arcade Cabinet | High for DIY, low for pre-built | Medium - table space and arcade parts | Authentic arcade feel in compact form | Arcade game fans with limited space | Compact, authentic arcade controls |
| Handheld-Focused Gaming Corner | Low - medium if hardware mods involved | Low - minimal space, seating, lighting | Comfortable handheld gaming sessions | Portable game collectors and RPG players | Comfortable, portable, showcases collections |
| Modern Display with Upscaler | High - video signal/timing knowledge | Medium - upscalers + original consoles | Authentic hardware on modern displays | Hybrid needs: authentic play with modern TV | Best of both worlds, excellent image quality |
| Themed Room Recreation | Low-Medium gaming, High interior design | High - dedicated room, authentic decor | Fully immersive era-specific atmosphere | Nostalgia lovers and content creators | Unique, immersive, great for entertaining |
| Flash Cart and Everydrive Setup | Medium - ROM management and firmware | Low - uses existing consoles | Wide game libraries on original hardware | Players wanting variety without cartridge clutter | Hardware authentic, easy game library access |
Press Start: Bringing Your Retro Vision to Life
We've explored a wide spectrum of setups, each a unique portal back to the golden age of gaming. From the authentic flicker of a Classic CRT Monitor Setup that honors original hardware to the streamlined efficiency of a Multi-Console Emulation Station, the path to your perfect nostalgic corner is yours to define. The journey is about more than just playing old games; it's about curating an experience that resonates with your personal history and passion.
The most crucial takeaway is that there is no single "correct" approach to building your ultimate retro gaming setup. Your ideal space might be a compact Handheld-Focused Gaming Corner designed for quiet evenings, or it could be an ambitious Themed Room Recreation that transports you directly into the world of Hyrule or the Mushroom Kingdom. The key is to find the perfect intersection of your available space, budget, and desired level of authenticity.
Your Personal Gaming Blueprint
The ideas presented are not just isolated concepts; they are building blocks for your own creation. Consider how these approaches can be mixed and matched to suit your specific needs. Perhaps your dream setup involves a modern display with a high-quality upscaler for crisp visuals, but you also incorporate a collection of flash carts to enjoy vast libraries without the clutter of countless cartridges.
Key Insight: The best retro gaming setup ideas are those that balance authenticity with practicality. Whether you're a purist dedicated to original hardware or an enthusiast leveraging modern technology for convenience, the end goal is the same: to create a space that celebrates the games you love.
Actionable Next Steps to Begin Your Build
Feeling inspired? The next step is to move from ideation to action. Don't let the scope of the project overwhelm you. Start small and build your setup incrementally.
- Define Your Core Goal: What is the primary purpose of your setup? Is it for solitary play, hosting friends, or displaying a collection? Your answer will guide every subsequent decision, from choosing a display to planning your layout.
- Assess Your Resources: Take a realistic look at your available space and budget. A DIY Bartop Arcade Cabinet might be a fantastic weekend project for a small corner, while a dedicated room is needed for more elaborate themed designs.
- Start with a Keystone Piece: Select one central element to build around. This could be a specific console from your childhood, a vintage CRT television you found locally, or a powerful PC for emulation. This focal point will give your project direction.
Mastering the art of the retro gaming setup is about more than just technical skill; it’s about thoughtful curation. It’s about creating a personal sanctuary where you can disconnect from the present and reconnect with the foundational experiences that shaped your love for gaming. The result is a highly personalized space that not only functions as an entertainment hub but also serves as a tribute to the timeless creativity of the industry. So, pick your path, gather your components, and get ready to press start on an incredibly rewarding project.
Ready to find the cornerstone of your new setup? Old Arcade specializes in authentic, high-quality retro consoles, handhelds, and accessories to bring your retro gaming setup ideas to life. Visit Old Arcade to explore our curated collection and find the perfect piece to start your nostalgic journey today.
Article created using Outrank

